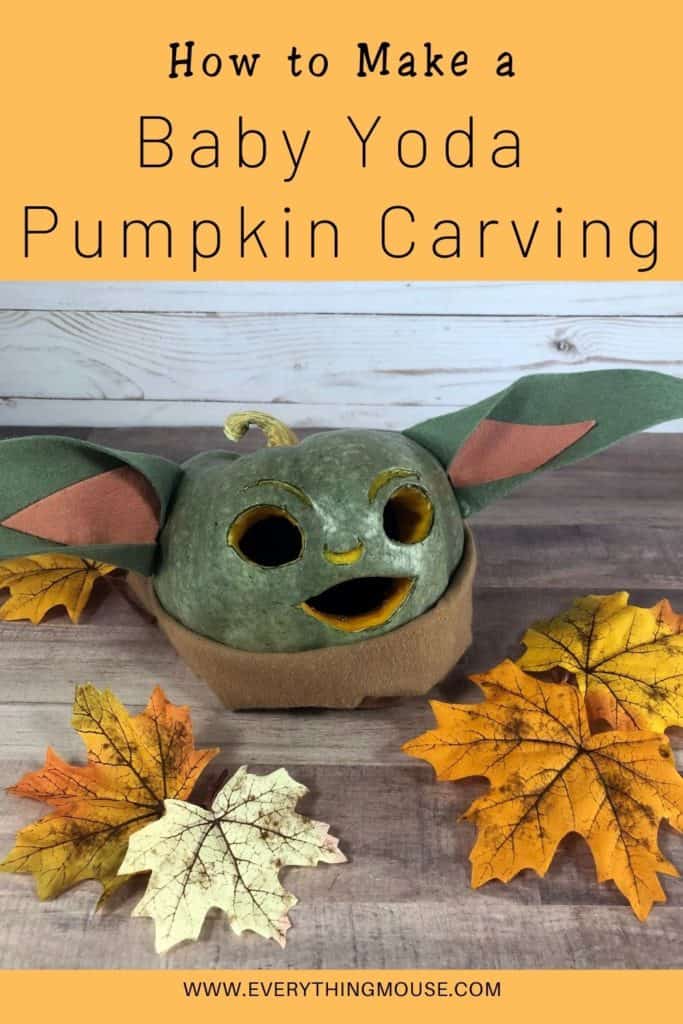
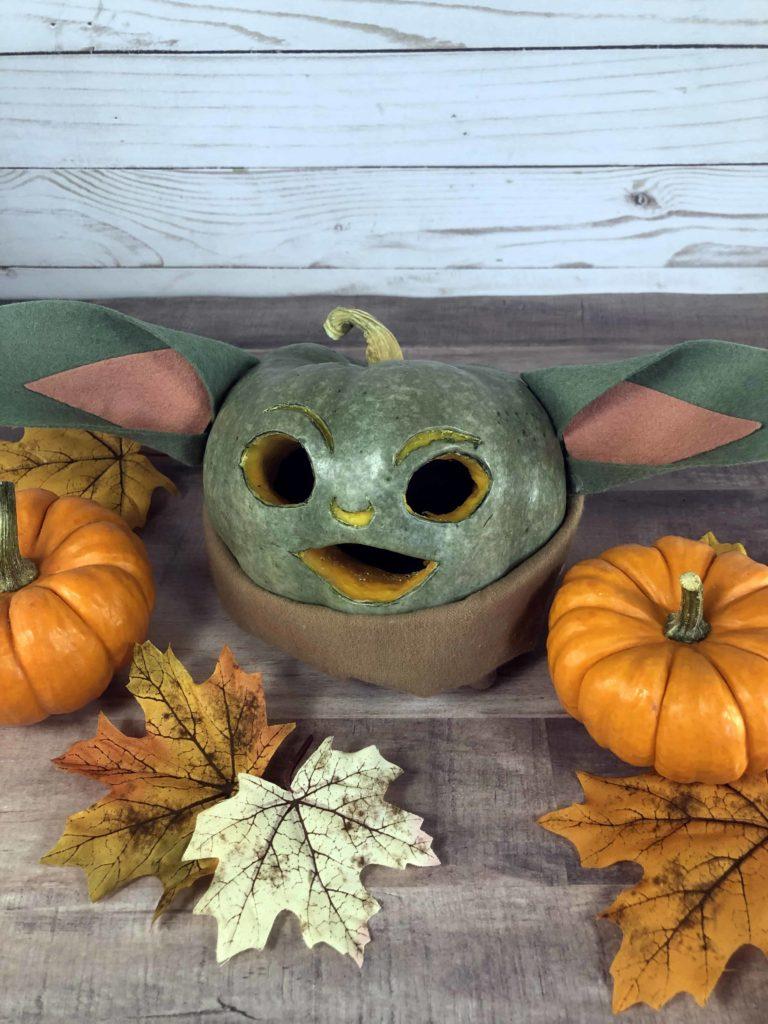
Want to make this adorable Baby Yoda Pumpkin Carving for Halloween?
The Child, or Baby Yoda as he instantly became affectionally known, made his debut on the Disney + Mandalorian hit series. We can’t get enough of his quintessential cuteness!
This Halloween Baby Yoda Pumpkin is easy to make for your Halloween celebrations. We give you step by step instructions to show you how.
This post contains some affiliate links for your convenience. If you buy something after clicking on a link I will earn a small commission, but it doesn’t cost you a penny more! For more details read my Disclosure
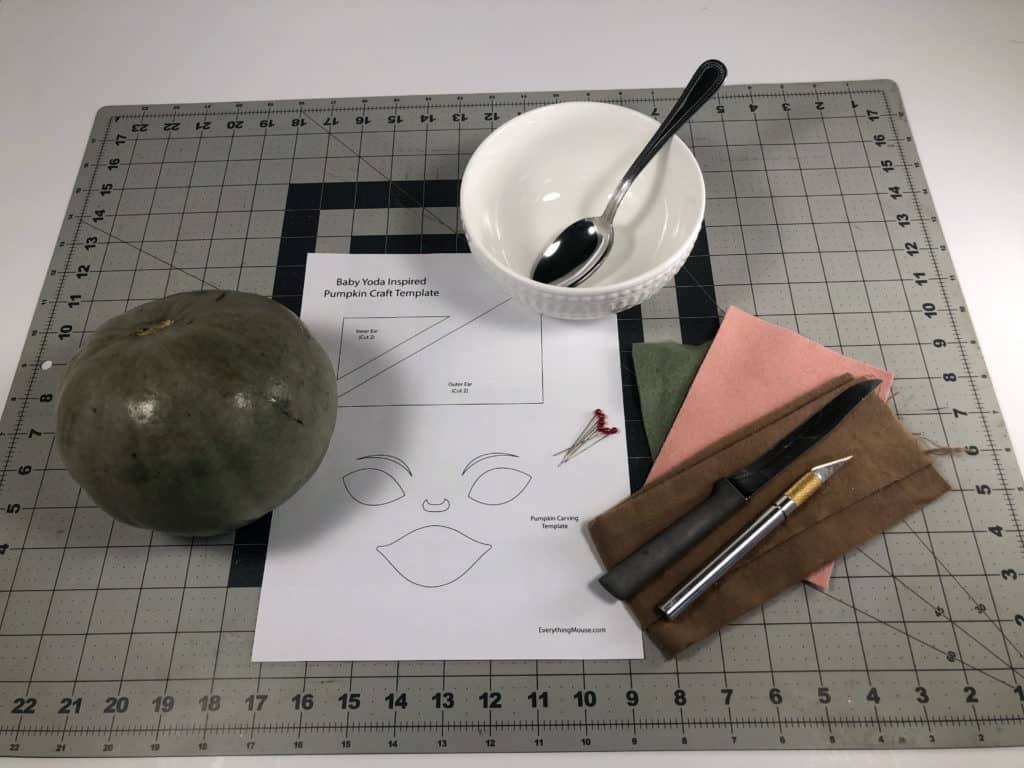
Materials:
- 1 small green pumpkin (about 6” wide)
- 1 sheet of green felt
- 1 sheet of pink felt
- 1 strip of brown fabric (I used flannel) that is about 6” wide, and long enough to wrap around the bottom of your pumpkin
- Scissors
- X-Acto Precision Knife

- Thin kitchen knife
- Large bowl
- Spoon
- Newspaper or wrapping paper to cover the table
- Hot Glue Gun or Aleene’s Tacky Glue
- Sewing Pins
- LED Tea Lights
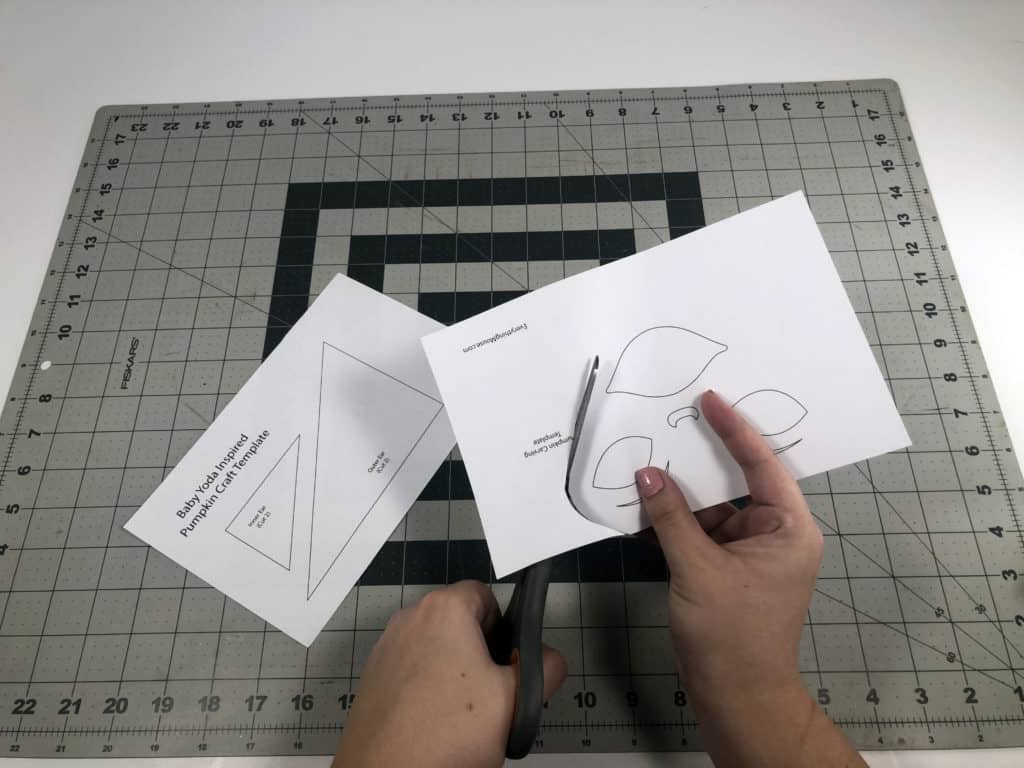
You will also need to print out the template which you can ACCESS HERE:
How to Choose a Pumpkin for Carving
For Baby Yoda you are of course going to need to find a green colored pumpkin. Fortunately, these are pretty easy to get and this saves you from having to paint your pumpkin.
When you choose which one to get from the store look at the shape closely, This tends to vary quite a bit and will influence how your finished Baby Yoda looks. Make sure that the pumpkin can actually stand up by itself and that it looks uniform on all sides.
First, make sure that the skin is relatively smooth and even colored. There will be some variations but just think about which one will look best on your finished carving.
Check that when you put a small amount of pressure on the pumpkin that it does not feel squishy. When you lightly tap the side of the pumpkin it should sound hollow, not solid.
How To Make Baby Yoda Pumpkin
Directions:
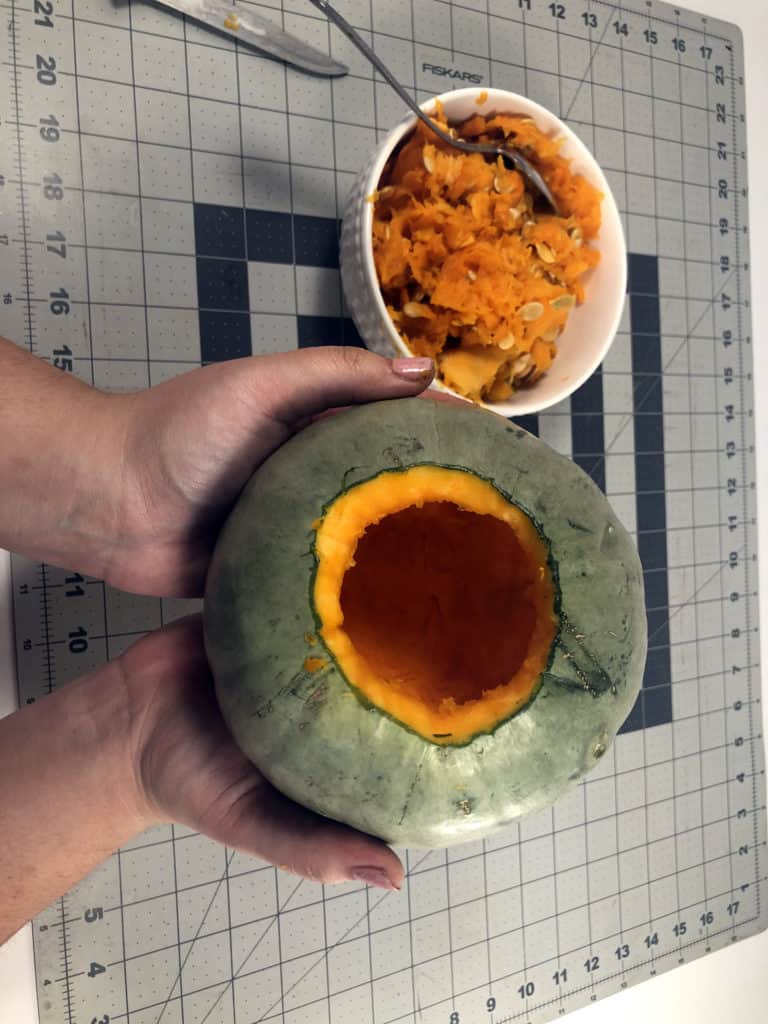
Cover your table in newspaper or wrapping paper so it doesn’t get covered in a sticky mess of pumpkin guts.
Cut a hole in the bottom of your pumpkin, and scoop out all of the soft bits and seeds from the middle. If your pumpkin has thick walls, use your spoon to scrape away some of the side you will be cutting so that it’s easier to carve.
Print out the template and cut out ear pieces. If your pumpkin is bigger than about 6-7”, you may need to resize the template before you print it.
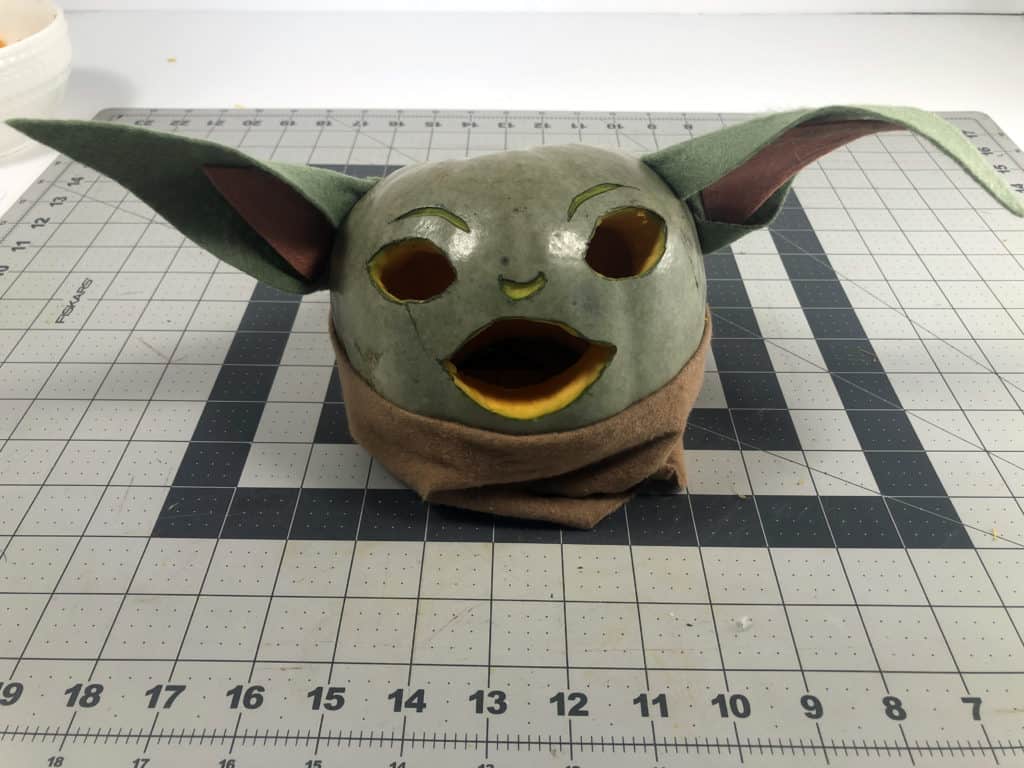
Trace the face template onto the pumpkin.
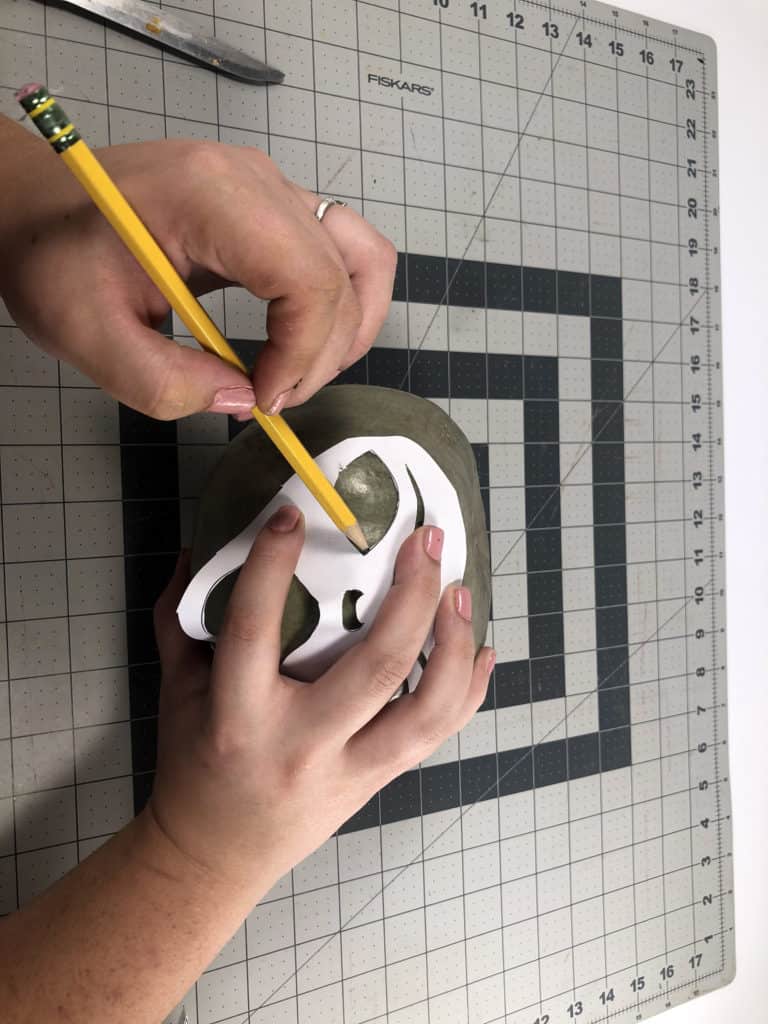
Use the X-Acto knife to get smooth curves and then use your kitchen knife to cut the rest of the way through the eyes and mouth.
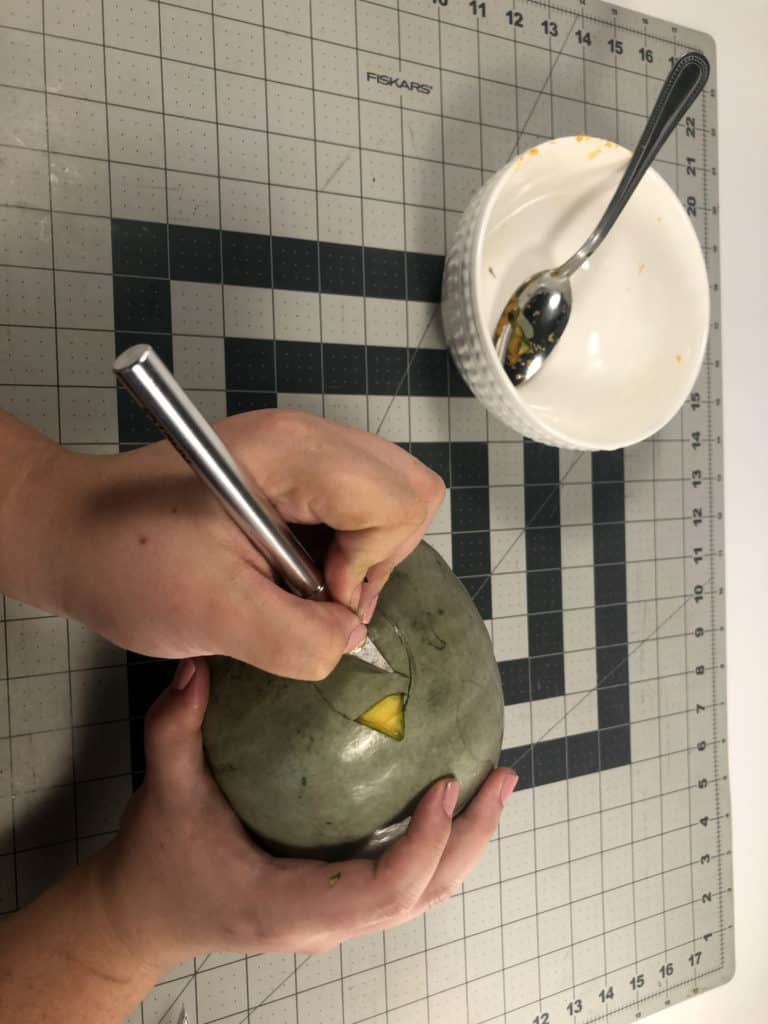
For the eyebrows and nose, just use the X-Acto knife to cut away the skin. These will be too thin to have light shine through.
Once you are done carving, cut two outer ears from green felt, and two inner ears from pink felt.
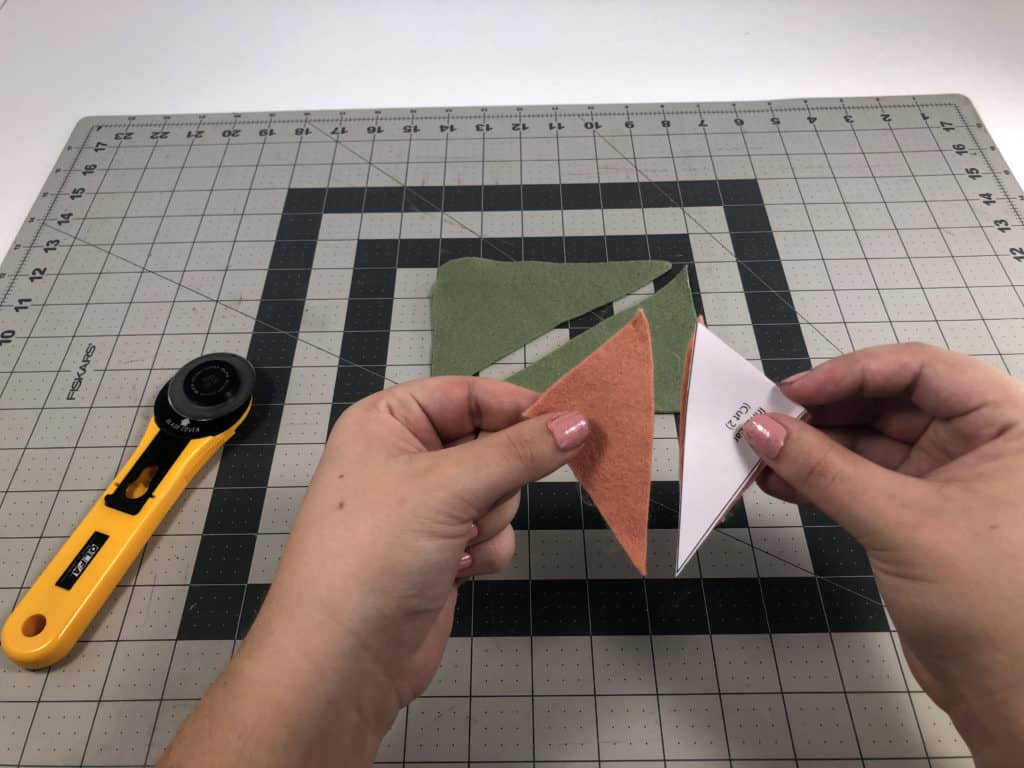
Layer each inner ear onto an outer ear so that the triangles face the same direction, with the short side of each inner ear about half an inch away from the short side of the outer ear, and about centered vertically. Make sure the ears are symmetrical.
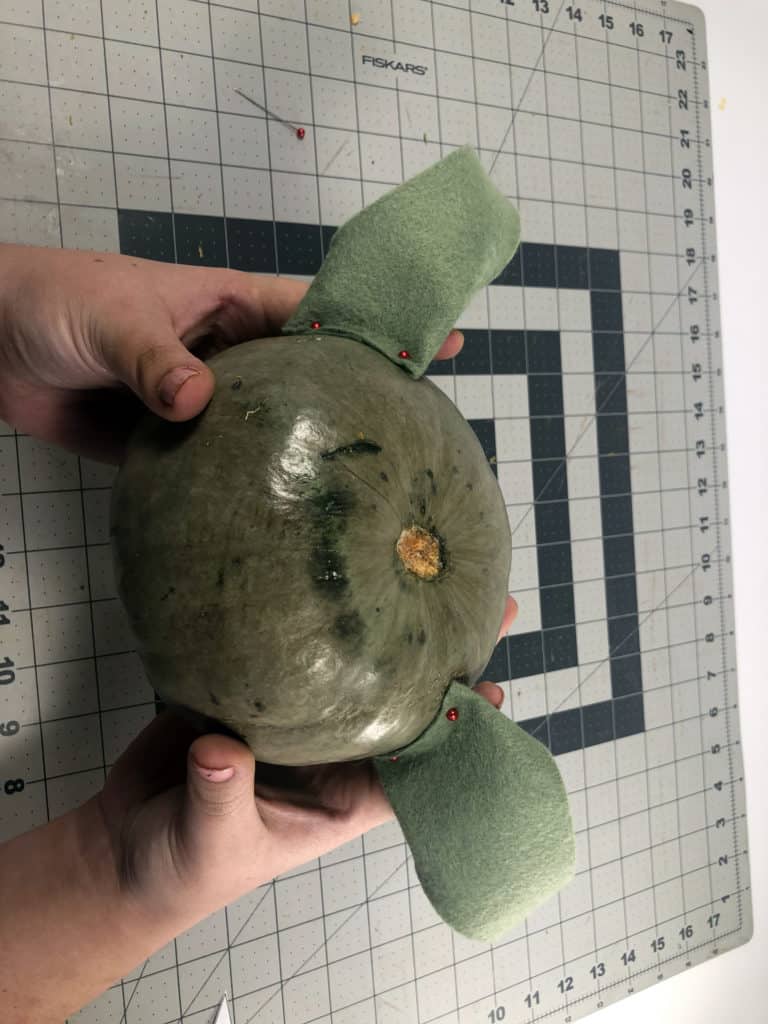
Glue the inner ear onto the outer ear. Then fold the top and bottom corners of the short side to the middle of that side and glue in place to make the ear folds.
Use two sewing pins on the back of each ear to pin them to the sides of the pumpkin. (You can try gluing them, but I found that they didn’t stick very well with the hot glue.)
Finally, fold the brown fabric in half length wise, and use sewing pins to pin it in place around your Baby Yoda’s “neck”.
Note: Because of the fabric used in this project, DO NOT use real candles to light up your pumpkin.
These LED Tea Lights Realistic and Bright Flickering are a great option to use with your Disney Halloween Pumpkin. ![]()
How Long will Your Halloween Pumpkin Last?

This depends on quite a number of factors, including the original condition of the pumpkin. An un-carved pumpkin will usually last between 8 and 12 weeks from the time that they are harvested.
However, once you have carved your Yoda pumpkin his shelf life will reduce considerably. There are some things that you can do to help him survive though!
Firstly never carve by removing the stem. This is the most vulnerable part of the pumpkin and you will speed up the decaying process if the stem is damaged. Always carve from the bottom or the back of the pumpkin.
Keep your Baby Yoda Pumpkin as protected from the elements as possible. Away from either extreme heat or cold, and away from rain.
You can also moisturize your Disney Halloween pumpkin! Get a spray bottle with a mix of mostly water, but add some Dr. Bronner Peppermint Pure Castile Oil ![]()
Are you a fan of Disney +? There are so many amazing shows to watch for one very reasonable low price subscription.
You will want to see our guide to Best Movies for Teens, or maybe the 20 Best Movies to Watch on Disney Plus. If Pixar is more your thing then you must check out Best Disney Pixar Shorts on Disney Plus.
Disney Plus really is the essential streaming service for Disney fans. It has a huge variety of things to watch – not just the obvious Disney movies. You can get the details at Disney +
Pricing starts at just $69.99 a year or $6.99 per month.

Alison Meacham is the founder of EverythingMouse Disney Blog. For over 15 years she has shared her love of Disney Parks, Disney Cruises and Universal Orlando. In over 30 years of Disney Travel she has spent countless months in Disney Parks and has sailed on over 45 cruises. A British native and now a United States resident she splits her time between California, Florida and the UK. And spends a serious amount of time sailing the seven seas. She helps over 200,000 people per month follow their Disney travel dreams.