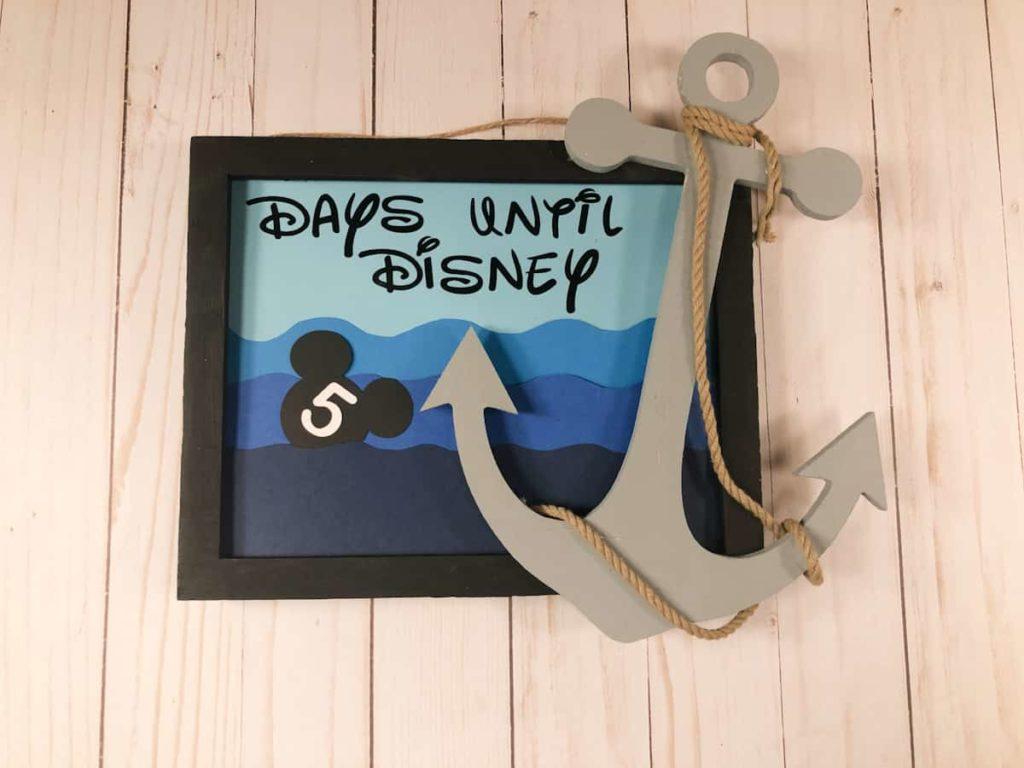
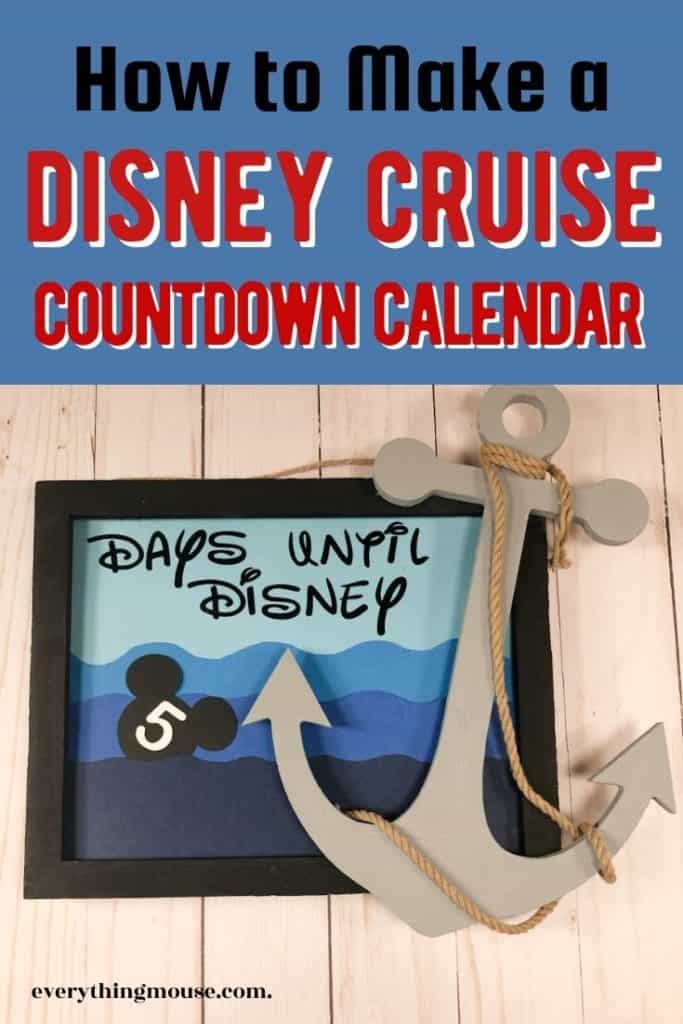
Looking for a Disney Countdown Calendar? It is a lot of fun to countdown your days to your Disney Cruise or Disney World visit with a countdown calendar.
Here we show you how to make a Disney Cruise Countdown Craft. You can also use the basic design to adapt it to a Disney World or Disneyland Countdown Calendar.
Supplies for Disney Countdown Craft

This post contains some affiliate links for your convenience. If you buy something after clicking on a link I will earn a small commission, but it doesn’t cost you a penny more! For more details read my Disclosure
Here are the supplies that you need. If you are not making a Disney Cruise Countdown, but are doing this for the parks, of course you can omit the anchor.
7×9 wooden sign
Black and grey/silver acrylic craft paint
Paintbrush
Hot glue gun
Rope sewing trim
4 Shades of Blue Card Stock Paper
Scissors
Scrapbooking glue stick
Cricut machine and fine point blade
Standard grip cutting mat
Black adhesive vinyl
Mickey svg
How to Make a Disney Countdown Calendar
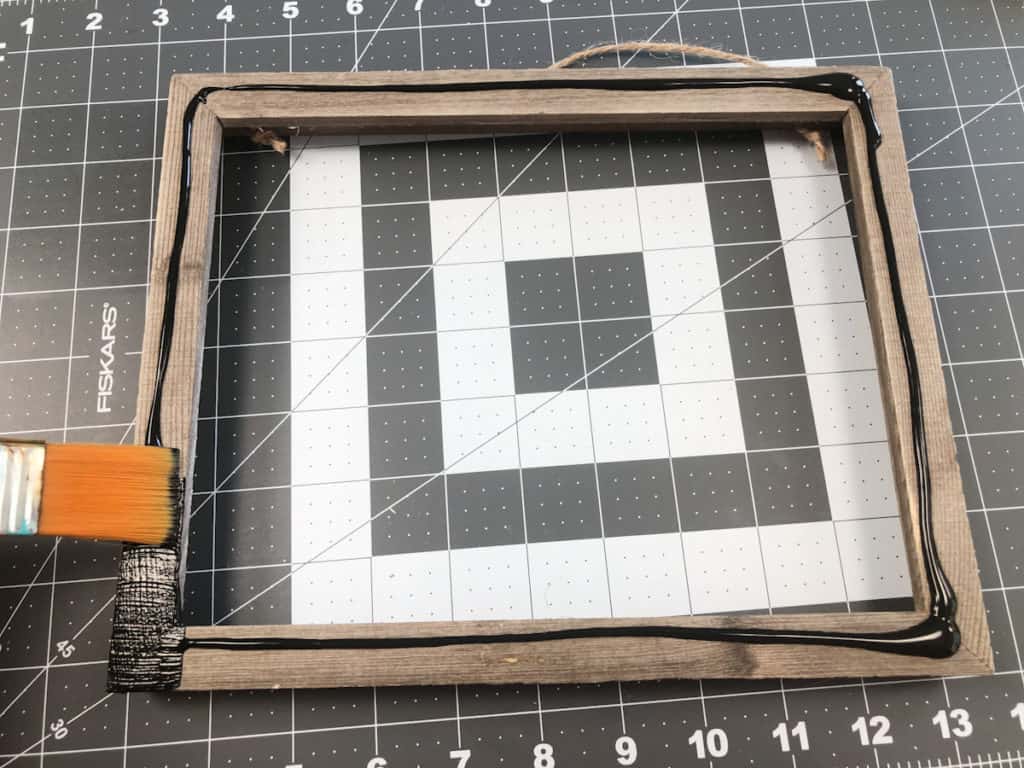
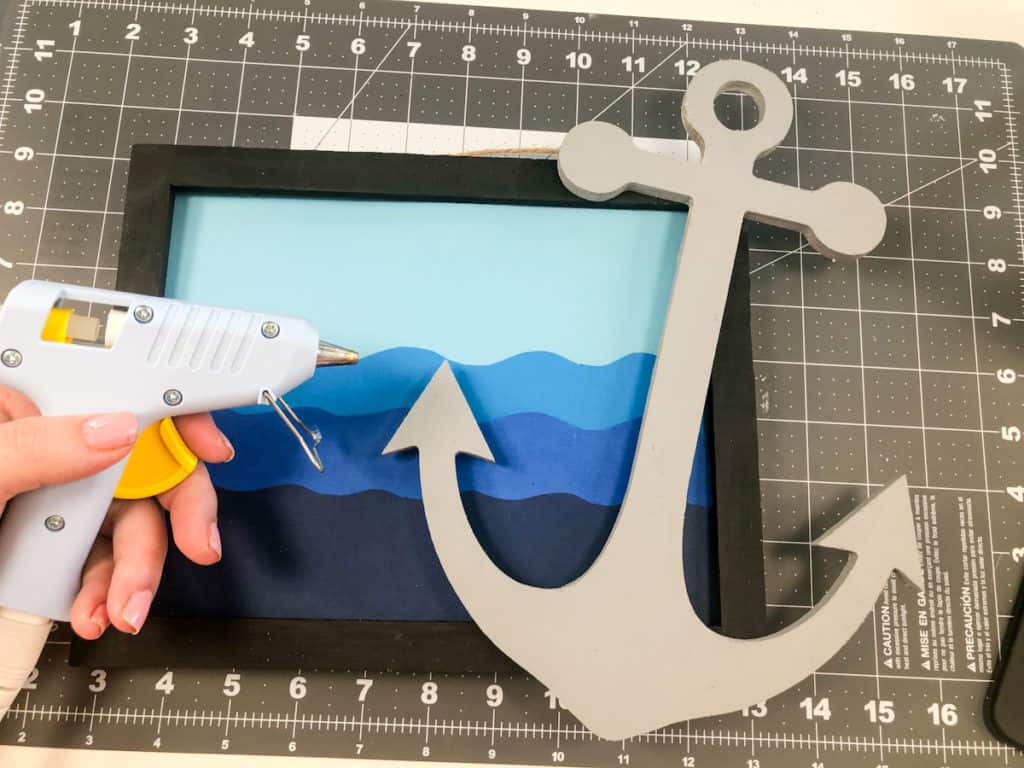
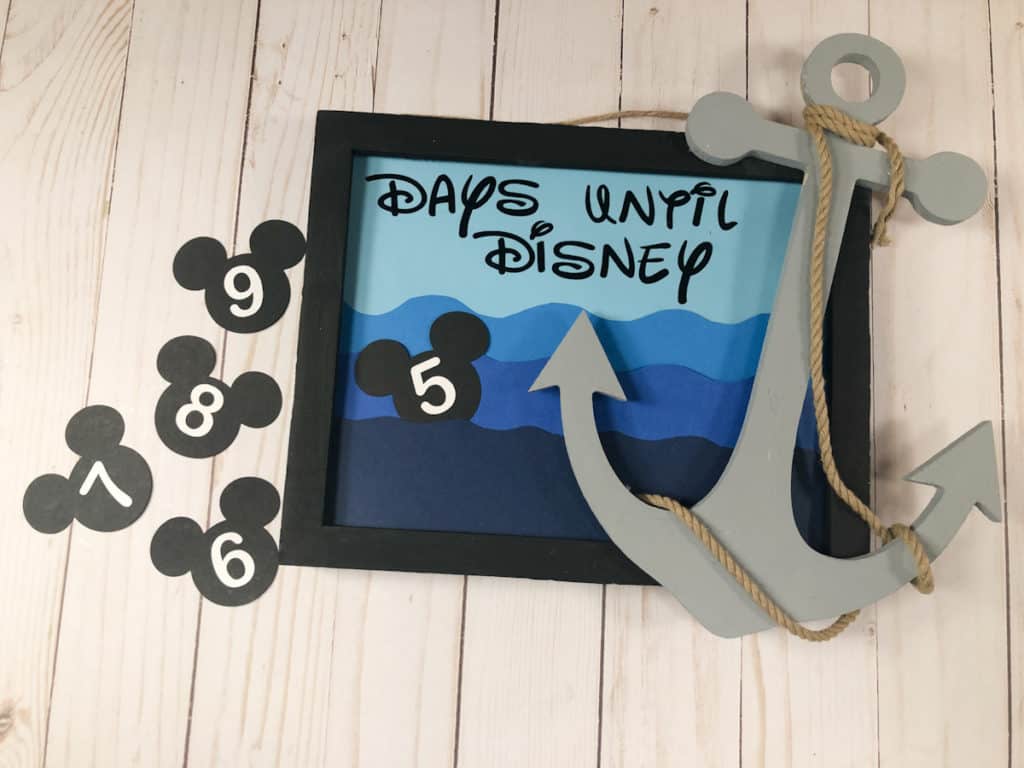
If you can easily detach the frame from the sign, do that first.
Then paint the frame black set it off to the side to dry.

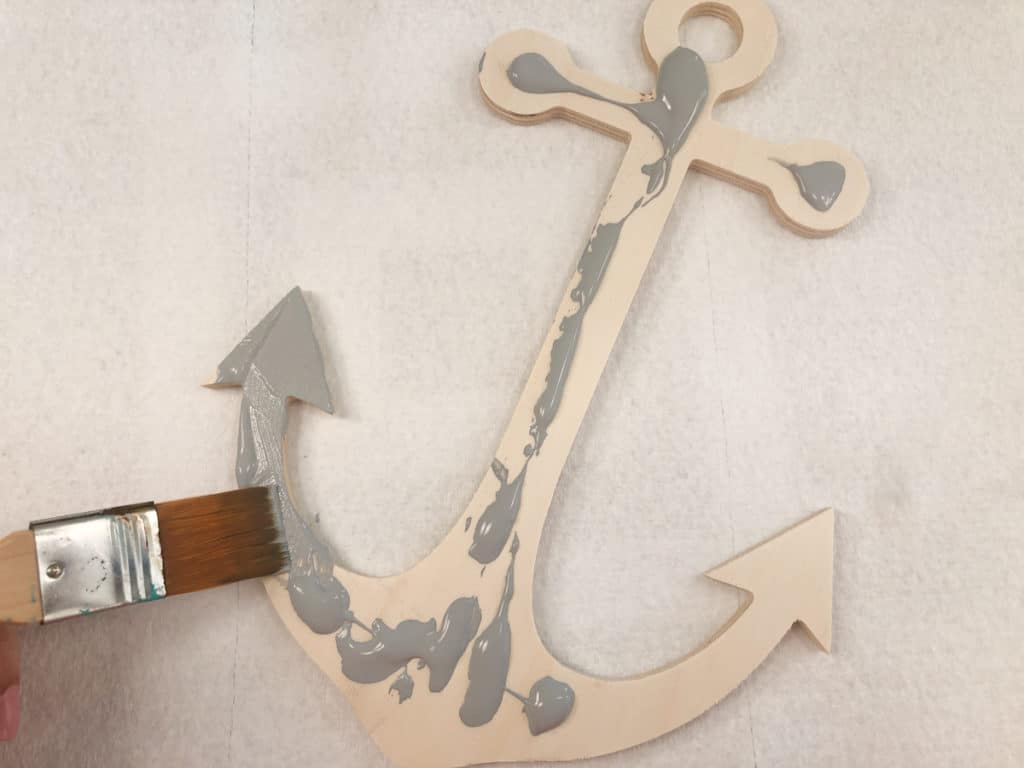
Paint the anchor gray and leave to dry.

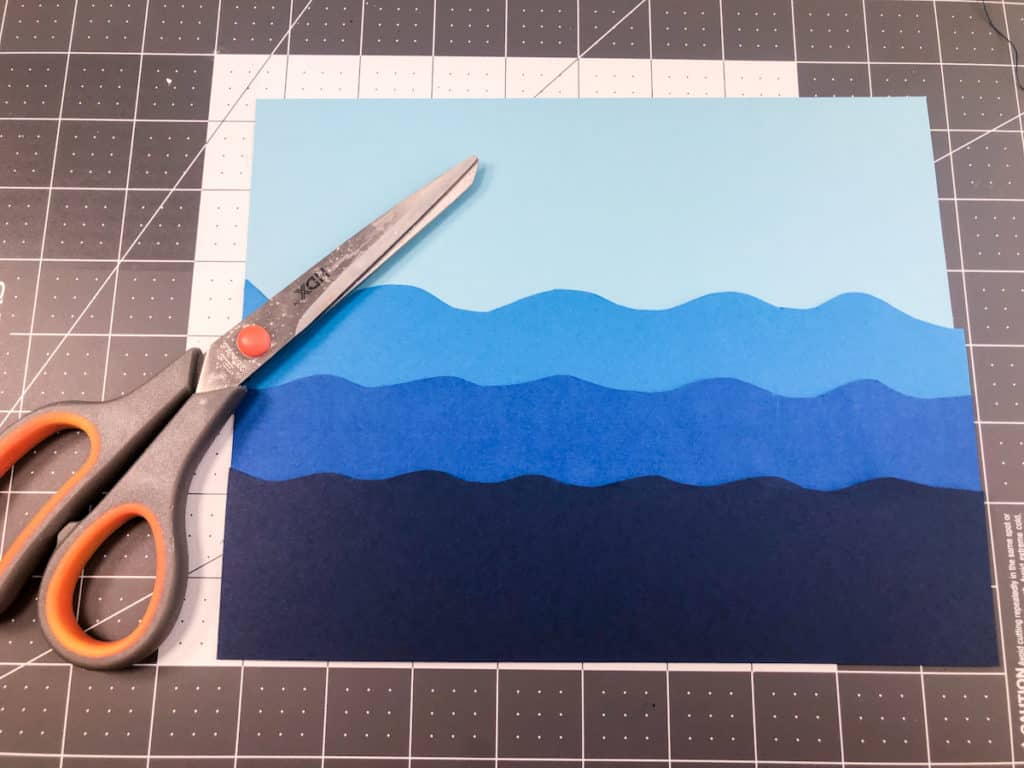
Cut the Card Stock into rectangles that are the width of the board. The lightest blue should be the same height as the sign.
The other three should get increasingly shorter as they get darker.
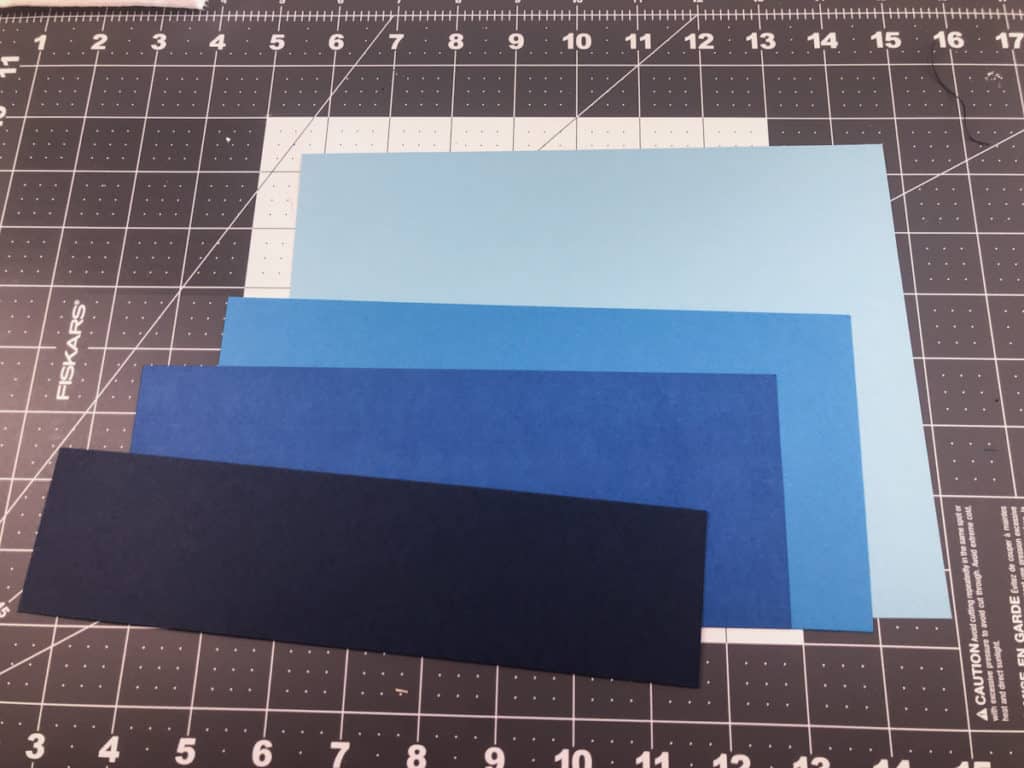

Trim the tops of the shorter three pieces into a wavy pattern to look like ocean water.Layer and glue the Card Stock together and to the sign.
Don’t put glue all the way up to the top of the darkest paper. You’ll need a small opening to slide the countdown into.

Once the paint is dry, you can press the frame back onto the sign, and hot glue the anchor onto the frame. Add some rope trim around the anchor for an extra nautical touch.

Next, use Cricut Design Space to create the text for your sign. Download the “Walter” font from Dafont.com and resize it so it will fit properly in your sign.
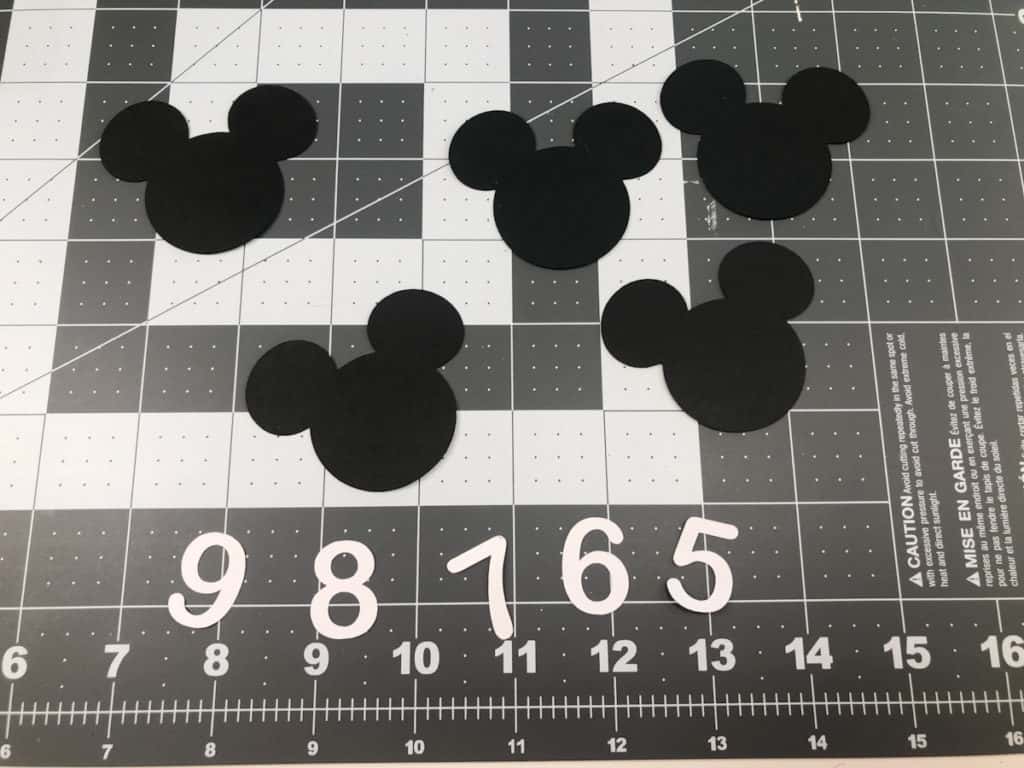
You will also need to make the numbers for the countdown. Two of each number 0-9 will give you up to 99 days (about 3 months) worth of counting down.
An extra number 1 will get you to 6 months. Upload the Mickey SVG and resize to about 2”. Duplicate it so you have as many Mickeys as numbers.

Even though the words and the Mickeys are both black, you have to make them two separate colors in design space so that you can cut them out of different materials.
Use your Cricut to cut the words out of vinyl, and the Mickeys and numbers out of black and white Card Stock.
Weed each letter individually from the vinyl and place it onto the sign. Using transfer tape could ruin the Card Stock.
Next use scrapbooking glue to attach each number to a Mickey.
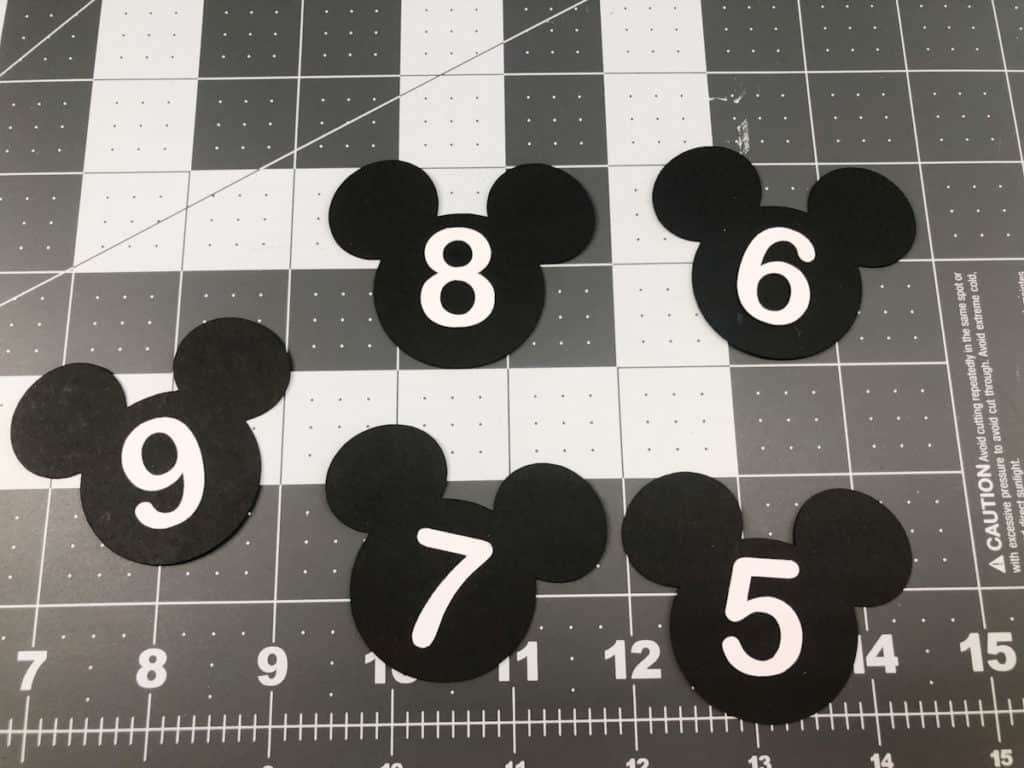

Then you can just slide the correct numbered Mickey into place!

Disney Crafts to Make at Home
Do you enjoy making Disney Crafts? We have lots of ideas for you so that you can make your own DIY Disney Crafts!
Why not try our Disney Tangled DIY Candle Lanterns? Or if you are looking for Disney DIY Ears try these Disney Cruise Ears DIY.
Want to make your own Disney Christmas Ornaments check out this adorable Disney Stitch Ornament and cute Mickey Christmas Ornament.
If it’s Halloween time this is the essential Baby Yoda Pumpkin!
Enjoy!


Alison Meacham is the founder of EverythingMouse Disney Blog. For over 15 years she has shared her love of Disney Parks, Disney Cruises and Universal Orlando. In over 30 years of Disney Travel she has spent countless months in Disney Parks and has sailed on over 60 cruises. A British native and now a United States resident she splits her time between California, Florida and the UK. And spends a serious amount of time sailing the seven seas. She helps over 250,000 people per month follow their Disney travel dreams.